This is your guide on how to clean just about anything. Use these techniques for cleaning your home and everything in it.
You’ll find cleaning is most effective and least bothersome when it’s done as a regular part of your everyday life. Too many people see cleaning as an odious chore that can’t be avoided (but is all to easy to put off). I’m here to convince you of the opposite: that if you have a positive attitude about cleaning and its benefits, cleaning becomes something that is much easier to accomplish. The more you know about cleaning and the more organized you are about it, the less effort, time and money you will have to spend actually doing it.
Below is an A-Z cleaning guide, which explains in precise detail how to clean common items in and around the home.
Note: New items are always being added so please check back regularly.
Aluminum
Cleaning aluminum window and door frames is not a real problem. They are sold with a tough coating. An all-purpose cleaner will shine them up nicely. Cleaning older bare aluminum, the kind sold with a milled finish, presents more of a challenge – Aluminum Cleaning Solutions
See also:
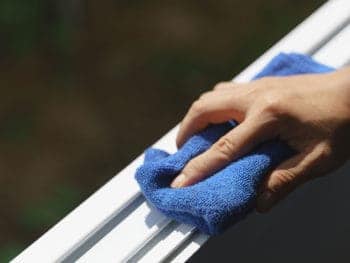
Much of the aluminum that enters your life these days is extremely easy to care for.
Cleaning aluminum window and door frames is not a real problem. They are sold with a tough coating – white, primarily, but sometimes bronze or brown.
An all-purpose cleaner will shine them up nicely. But why not take care of two cleaning chores at once? Clean your windows with a glass cleaner, then wipe down the aluminum with the same stuff.
Cleaning older bare aluminum, the kind sold with a milled finish, presents more of a challenge. It may have started out shiny, but it tends to oxidize from years of exposure to the air, turning it a darker gray and giving it a rough feel. To clean this old-time aluminum, apply some penetrating lubricant/degreaser, which can be found in hardware stores and supermarkets, usually in the car accessories section. Spray it on or apply it with a cleaning rag. Then go over the aluminum with fine steel wool (00). Move the steel wool back and forth (not in circles), and don’t rub so hard that it scratches.
When you’re finished cleaning aluminum, wipe the oil off with a clean rag. Test this method on an inconspicuous area first. This technique will make your aluminum lighter and brighter, but the effects of oxidation can’t be totally erased. If you’re still not happy with the appearance of your aluminum, consider giving it new life with a coating of latex paint. (Oil-based paint won’t stand up to the expansion and contraction that aluminum goes through outdoors.)
I hope this guide on how to clean aluminum brings you cleaning success!
Brass
There are two kinds of brass to consider – brass with a protective lacquer coating (most common) and raw brass. Raw brass is the bigger challenge to care for, since this copper-and-zinc alloy oxidizes when it is exposed to air, resulting in tarnish – Brass Cleaning Solutions
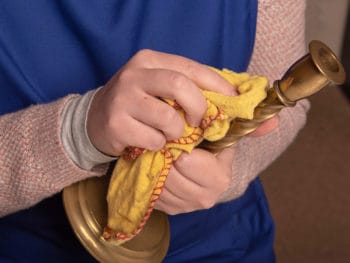
This is your guide on how to clean brass to keep it looking shiny and spotless. There are two kinds of brass to consider – brass with a protective lacquer coating (most common) and raw brass. Raw brass is the bigger challenge to care for, since this copper-and-zinc alloy oxidizes when it is exposed to air, resulting in tarnish. Removing tarnish from raw brass requires some elbow grease.
To remove dirt from lacquered brass, mix mild dishwashing liquid with warm water and apply it with a nonabrasive sponge or cloth. Rinse with fresh water and dry thoroughly with a soft cloth. Buff with an extremely soft cloth (cloth nappies are recommended) or chamois. Avoid toweling and paper towels, because they will scratch the surface.
To remove tarnish from raw brass, take a tip from antique dealers and the military: use a metal polish, which contains cleaners to eliminate the tarnish, abrasives for polishing and oil to protect the brass from the air. Follow the instructions on the package. Use only a thin layer of metal polish – more is not better. To keep your unlacquered brass gleaming, you will need to polish it every few months.
How to clean brass naturally: When a commercial brass cleaner isn’t available for removing tarnish from raw brass, slice a lemon in half, sprinkle the cut surface with salt and then squeeze the lemon over the brass that needs cleaning. Wipe down the brass with one soft cloth and then buff the brass with a second soft cloth. The technique works equally well with lacquered and raw brass. An alternative: make a paste of bicarbonate of soda and water (or just use toothpaste, also a mild abrasive). Apply the paste to a soft cloth and then rub the brass. Wipe clean with a fresh cloth. After cleaning brass, rub unlacquered brass with a light coating of mineral oil, olive oil or lemon oil to protect it from further tarnish. Lacquered brass doesn’t need this protection.
To shine up soot-grimed brass fireplace equipment, the aforementioned techniques for cleaning brass may not be sufficient. If so, try rubbing the brass with extra-fine steel wool or very fine emery paper. Careful, you’re in abrasive territory now. Rub the metal in one direction only – not with a circular motion. Once the brass is clean, follow up with a commercial brass polish.
Simple solution: To remove a sticker from brass, don’t attempt to scrape it off—this could damage the finish. Apply isopropyl alcohol, Bestine Solvent and Thinner or Zelkin (available at art stores) to a cloth nappy. Wipe the solvent onto the sticker and leave it for a few seconds. Then wipe the sticker and its gummy adhesive away. Buff with a clean nappy.
I hope this guide on how to clean brass brings you cleaning success!
Carpets
For routine carpet cleaning, carpet people say there are three things to consider: vacuum cleaner, vacuum cleaner, vacuum cleaner. Vacuuming removes about 85 percent of carpet dirt. To get down to the deep dirt, you need to periodically give your carpeting a more thorough cleaning than a vacuum cleaner can provide – Carpet Cleaning Solutions
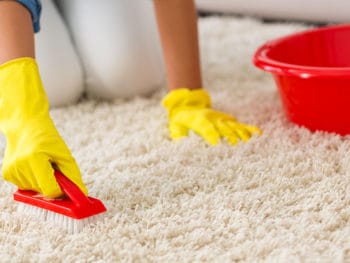
This is your guide on how to clean carpets to keep them looking spotless. Always read the care instructions that come with your carpet, as these will give you specific advice on products and cleaning methods. For routine carpet cleaning, carpet people say there are three things to consider: vacuum cleaner, vacuum cleaner, vacuum cleaner. Vacuuming removes about 85 percent of carpet dirt. To get down to the deep dirt, you need to periodically give your carpeting a more thorough cleaning than a vacuum cleaner can provide. How often depends on your lifestyle, but the recommended range is every 6 to 18 months.
Vacuuming your carpeting every day would be ideal. But we don’t live like people in 1950s TV commercials, where women seemed to spend most of their days doing housework – in high heels, no less. Let’s face it: daily vacuuming is unrealistic for most households today. But do make it a point to vacuum carpeting at least once a week, even if it doesn’t appear dirty. Heavily trafficked areas should be hit a little more often. And be sure to vacuum up promptly any obvious dirt before it gets ground in.
For vacuuming your carpet, the more powerful your machine, the better. You can use either an upright vacuum, which was created with carpets in mind or a canister vacuum with a power nozzle, which does almost as good a job as an upright. Both of these have a rotary brush, designed to loosen the dirt in carpets. Here are some tips on how to clean carpets with a vacuum cleaner:
- Set your vacuum cleaner for the pile level of the carpet – unless your vacuum automatically adjusts to the pile level.
- When you vacuum an area, use slow, even strokes and go back and forth several times, flipping the nap by going alternately against and with the grain. Finish with strokes that all go in the same direction.
- Vacuum under furniture as best you can with extension attachments. About twice a year, move the furniture and vacuum the area under it thoroughly.
- With a rug, it’s a good idea to occasionally turn it over and vacuum the underside.
- If your vacuum cleaner won’t suck up cat hairs, threads or other fine items, use a lint roller or a piece of doubled—over tape to pick them up. Lint rollers are sold at supermarkets.
- New carpeting produces a lot of extra fluff. It’s normal – nothing to worry about.
How to clean carpets professionally: Professional steam cleaning is the ideal way of removing deep-down dirt from your carpet. There are several types of professional methods for cleaning carpets, but the Cadillac of them all is hot water extraction, or steam cleaning, done using a truck-mounted unit.
If you call in the pros, make sure that’s really what you’re getting. There are plenty of glorified do-it-yourselfers pretending to be professionals. If you follow these suggestions on How to Choose a Pro you won’t get any surprises when they show up at the door. They’ll swoop in with a big truck, get the job done fast and be out of your way. The big truck’s purpose isn’t to impress you, but to hold powerful equipment. One piece is a heating unit that keeps the water very hot throughout the process of cleaning carpets. Another is a very powerful vacuum, which will suck up all the water that the cleaner puts down.
How to clean carpets by steam cleaning yourself: the results won’t be as good as a professional job. But let’s say you just don’t want to pay for the professional job. Maybe your carpet is old and you’re going to replace it in a couple of years, but in the meantime you want to perk it up with a do-it-yourself steam-cleaning job. In that case, the most economical solution is to hire the most powerful steam-cleaning machine you can find. At the same time, hire a heavy-duty vacuum that will suck up water as well as solids. Follow the directions on the cleaning machine and change the water often. At the end, go over the carpeting with the vacuum and draw out as much additional water as you can. Get as much air circulation as possible in the room and don’t walk on the carpet until it’s dry.
If using a hired unit persuades you that do-it-yourself method of cleaning carpets is the way to go and expense is no barrier, explore owning your own deep-cleaning unit. Home machines are about the size and shape of upright vacuum cleaners. While they aren’t as powerful as the professional or hired cleaners, some of the newest home machines do an adequate job.
Three cleaning methods to avoid at all costs when considering how to clean carpets are listed below. You may be tempted to save money by trying one of them – either doing it yourself or hiring a professional. But it you do, be prepared to be disappointed:
- Shampooing uses a machine with a very aggressive brush and a cleaner mixed with water applied to the carpeting. The brush doesn’t pick up any dirt. It swirls everything around to create a foam. The idea is to let that dry and vacuum up the crystals. It is not an effective method for how to clean carpets.
- Spin bonnet cleaning adapts floor-buffing techniques to carpets. A “bonnet,” or round absorbent pad, is dipped into the cleaning solution and wrung out, then attached to a machine that spins it around. The bonnet is supposed to be removed and cleaned or changed when it is visibly dirty. But it cleans only the top of the carpeting. It grinds in dirt, creates soil and detergent buildup, and can damage the fibres and pile. This type of cleaning should only be done on cut-pile carpets, never on loop carpets.
- Dry cleaning is touted as an alternative method that won’t cause overwatering of carpets. It uses an absorbent granular material, which is laced with a solvent. It is distributed over the carpet and brushed in, left to absorb dirt and then vacuumed up. The trouble is, it isn’t very effective and the solvent evaporates in the air, polluting your home.
I hope this guide on how to clean carpets brings you cleaning success!
Computers
Computers collect more than just dust, grimy fingerprints, crumbs, hair, fingernail clippings and other unidentified miniature objects. We’ve heard reports that they have been home for cookies, Batman action figures, spider nests and half a cheeseburger – Computer Cleaning Solutions
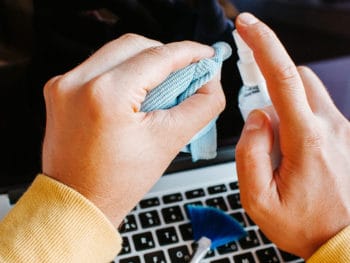
This is your guide on how to clean your computer to keep it looking spotless. Computers collect more than just dust, grimy fingerprints, crumbs, hair, fingernail clippings and other unidentified miniature objects. We’ve heard reports that they have been home for cookies, Batman action figures, spider nests and half a cheeseburger.
The regular procedure for cleaning your computer can be a quick once-over with a vacuum or dust cloth. But it’s a good idea to give it a more thorough cleaning occasionally. Once every three months is sufficient, although you’ll want to clean the screen every month or so. If you’re apprehensive, take it to a professional. If you opt for the at-home treatment to clean your computer, the first step is to make sure the computer is turned off and unplugged.
Cleaning your computer screen if it’s a traditional tube monitor: Dust it with a clean cloth or a facial tissue. To remove finger prints, wipe with a slightly damp cloth. Special towelettes, sold at office supply stores, may be used on the screen, but they sometimes leave a soapy film. Try an all-purpose cleaner instead, sprayed on a cloth and then wiped on the screen. Avoid ammonia-based cleaners, because they sometimes leave unsightly streaks.
How to clean your computer flat screen monitor: Use special care. This also applies to the screen on a laptop. First unplug the power supply, then lightly dampen a clean, soft, lint-free cloth (no paper towels or facial tissues on these babies) with water and isopropyl alcohol (not ethyl alcohol). Wipe the screen gently with a back-and-forth motion, never in a circle. Wipe the display case gently with a nonabrasive, soft, dry cloth to pick up dust. And take these precautions to prolong the life of your flat screen: never tap or touch the screen with your pen, finger or other object. And don’t slap sticky notes on your screen.
If you have a new flat LCD monitor – or a lap-top – never use products containing acetone, ethyl alcohol, toluene, ethyl acid, ammonia or methyl chloride to clean the screen. They can damage it.
How to clean your computer keyboard: First turn it upside down over a wastepaper basket and give it a good shake. Most crumbs and dust will fall right out. Then vacuum it with your brush attachment. To clean the keys, rub them and the surrounding plastic with a cloth dampened with isopropyl alcohol. Or purchase a special keyboard cleaner-degreaser. Using a can of compressed air, available at electronic and computer shops, blast away hair, crumbs and dust from between the keys. Rubbing keys with a fabric softener sheet will keep dust-attracting static at bay. A computer duster which attracts dust and can dust inside keyboards can be purchased at computer shops and supermarkets.
Don’t use ordinary household spray cleaners on your keyboard. If the liquid gets under the keys, it can damage the keyboard by shorting the contacts under the keys.
How to clean your computer mouse: Unscrew the mouse-ball cover on the bottom and take out the ball. Wipe it down with denatured alcohol, available at hardware stores and pharmacies, on a soft cloth. Remove any dust or fluff inside the mouse-ball socket with your finger. Then, with a cottonwool bud dipped in alcohol, clean the three rollers the ball touches inside the socket.
To clean inside your computer, you can also use compressed air. To open an upright computer, unscrew one side of the case. One side is usually held by screws with knurled heads that you can turn by hand, but on some models you may need to use a screw driver. Don’t touch anything inside that you don’t have to. Keep your fingers away from cards, cords and other parts. And be sure the compressed air wand is at least 10 centimetres from the machine. Blow air into the power supply box (that’s where the power cord enters) and the fan at the back of the case. Then blast a hit of air into the CD and USB disk drives. Before replacing the side, wipe it with a damp cloth. Let it dry before switching it back on.
How to clean your computer equipment exteriors: Simply wipe the outside surfaces with an all-purpose cleaner, sprayed on a soft cloth. Dust can collect in ports where you attach cables. Use the compressed air with wand to blow the ports clean. Or give them a swipe with one end of a cottonwool bud dampened with isopropyl alcohol. Use the other end of the cottonwool swab to dry them.
To clean the glass bed of your scanner, use mild soap or an ordinary glass cleaner without ammonia. (Ammonia cleaners, unnless they’re completely wiped off, leave a film that could make scanned documents look weirdly oily or speckled.) Spray the glass cleaner on to a soft cloth rather than squirting it on the glass itself. Another approach: use denatured alcohol available from hardware stores and pharmacies. If there’s a metal ruler scale along the edge of the glass, avoid getting it wet. That goes for the glue holding it down too. Never use paper towels on your scanner. Even the more expensive types can make fine scratches on optical surfaces. Use soft, lint-free cloths instead. An old cloth nappy or clean T-shirt is perfect.
I hope this guide on how to clean your computer brings you cleaning success!
Granite Countertops
All granite is not alike. In fact, what you’re calling granite may not even be granite. Some of the countertops sold as granite may have only the appearance of granite. When it comes to cleaning granite countertops, knowing whether the material is genuine granite is important – Granite Countertop Cleaning Solutions
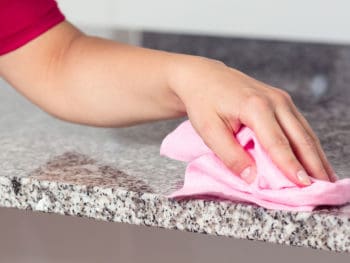
This is your guide on how to clean granite countertops to keep them looking spotless. All granite is not alike. In fact, what you’re calling granite may not even be granite. Some of the countertops and other architectural stone sold as granite may have only the appearance of granite. When it comes to cleaning granite countertops, knowing whether the material is genuine granite is important, because some cleaners that are considered safe for granite may react negatively with your stone. The acid in vinegar, for instance, eats away at calcium, which is not usually present in granite but may be in your stone.
And then there are the different types of surface finishes to consider, from raw stone to highly polished stone to chemically sealed stone. That may sound complicated, but cleaning the stone should not be. The best approach on how to clean granite countertops is the simplest.
To care for granite, keep oil sand and dirt, especially on flat surfaces, where it can be ground down by shoe soles or boots. The grit can scratch the stone. For walls, floors and other such surfaces, use either a vacuum cleaner or a dry dust mop. For countertops and tables, dust with a clean, dry rag. Wipe up spills immediately to avoid staining.
How to clean granite countertops in kitchens and bathrooms: first try using only warm water, wiping with a soft cloth or sponge. Let caked-on food soak a bit before wiping. You should be able to remove spills, crumbs, sauces and other things this way. If not, then add a little dishwashing liquid to the water. Rinse well with lots of clean water. Too much soap can leave a film or cause streaking. Avoid stronger cleaning products, such as bath and tile cleaners or scouring powders, as these can stain or scratch your stone.
For cleaning granite countertop stains, keep it simple and be patient. Most stains are solid residue jammed in between the crystals of the stone after the liquid that carried it has evaporated. The trick is to put the solid back into solution so it can be removed. First, determine whether your stain is water-based (for example, from spilled grape juice) or oil—based (salad dressing).
- If the stain is water-based, pour hot water (from the tap, not the kettle) on the stain and let it stand for a few minutes. Wipe away the excess water. Then stack 5 millimetres of paper towels on the stain and saturate with hot water. Cover with a piece of plastic (plastic wrap or a plastic drop cloth will do) and a flat, heavy weight, such as a cast-iron frying pan or a book (careful not to ruin the book). Let it stand for about 10 hours. (Do it overnight, and you won’t have to worry about anyone moving it.) Next, throw away the paper towels and the stain should go with them. Let the spot dry and then observe. If some of the stain is still present, repeat the treatment.
- If the stain is oil-based, follow the same procedure, only instead of water, use acetone (but do not heat). After the 10 hours is up, throw away the paper towels and rinse the spot with clean water. If necessary repeat. Acetone can be found on the paint thinner shelf in hardware stores.
I hope this guide on how to clean granite countertops brings you cleaning success!
Hardwood Floors
When cleaning hardwood floors, the bad news is that you really should get down on your hands and knees. That’s right. And you can’t swab water all over the floor – it must be used sparingly. So get ready to play Cinderella – Hardwood Floor Cleaning Solutions
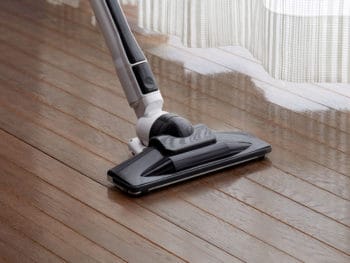
This is your guide on how to clean hardwood floors to keep them looking spotless. Not all floors are created equal. Even among general categories such as wood, stone or tile, there are vast differences between specific examples. Yellowwood isn’t pine, marble isn’t granite and quarry tile isn’t glazed.
Still, all floors are subjected to dirt and wear, and some basic cleaning techniques apply universally. Check the Floor Cleaning Pyramid for general floor cleaning methods and, when you’ve exhausted those, try the recommendations on how to clean hardwood floors.
The Floor Cleaning Pyramid
Remember the famous Food Guide Pyramid? You’re supposed to choose a lot of the foods depicted at the bottom of the pyramid (fruits, vegetables and grains) and eat the stuff at the top sparingly (sweets and oils). On the Floor Cleaning Pyramid, the broad bottom includes the cleaning methods that apply to all types of floors and that should be used most frequently. Frequency of use declines as you go up the pyramid and the top is reserved for specialized cleaners for different flooring materials. Here are other general guidelines for floor cleaning:
- Vacuum or sweep up loose dirt frequently.
- Chase clumps of dust with a dust mop.
- Wipe up any spills immediately.
- Clean with a damp mop or cloth (using plain water) weekly or more often. Change the water as soon as it gets cloudy.
- Go to stronger cleaners only when a damp mop doesn’t do the job.
- Rinse thoroughly after using any kind of cleaner.
How to clean hardwood floors. The bad news is that you really should get down on your hands and knees. That’s right. And you can’t swab water all over the floor – it must be used sparingly. So get ready to play Cinderella.
When damp mopping won’t do, try one of these general-purpose cleaners:
- Mix ½ cup of cider vinegar in 3.5 litres of warm water.
- Brew some tea using 2 tea bags per 1 litre of water. Don’t use instant tea.
Dip a soft cloth or sponge in the solution, wring it out and wipe the floor. Buff with a soft, dry cloth.
The object of caring diligently and cleaning hardwood floors – apart from keeping them looking good – is to avoid having to do a sanding job. It’s a lot of work if you do it yourself. It’s a lot of money if you hire someone to do it. It’s messy. And it removes from your floor not just the old finish but a layer of wood. Each time you sand, you’re working your way toward the foundation.
Determining a wooden floor’s finish will help you determine how to clean hardwood floors. If the floor was installed or last refinished before the mid 1960s, the finish is probably varnish or shellac. These finishes rest on top of the wood, are often waxed, and require a whole-floor sanding before a new finish can be applied. Later finishes may be polyurethane, which penetrates the wood, should not be waxed, and can be touched up by new urethane applied to just the worn places.
You can tell one from the other by scratching the surface with a coin in an inconspicuous place. If the finish flakes, it is probably shellac or varnish. If the finish does not flake, it is probably a polyurethane finish.
To check for wax, put a couple of drops of water on the floor. Wait 10 minutes and check to see whether white spots have appeared under the water. White spots mean the floor has been waxed. If there are no white spots, it hasn’t.
On varnished or shellacked floors, a solvent-based liquid wax for wood works well. It removes dirt and most of the old wax (preventing wax build up) and leaves a thin coating of new wax. You can apply the cleaner with a soft, dry cloth attached to a long-handled wax applicator, but you would do a better job on your hands and knees. You can also use an electric polisher, changing pads frequently. In any case, you must buff afterward with a clean cloth. Never use water-based self-polishing wax on wooden floors.
On urethane-finished floors, rub with a cloth containing a little furniture oil to give them more shine. (Read the label to make sure it doesn’t contain any wax.) Be sure to use very little; too much oil will attract dirt – and turn the floor into a skating rink.
I hope this guide on how to clean hardwood floors brings you cleaning success!
